
I have these new colourways that I sent off to test knitters to play with. One intrepid tester, Tammy aka Tante Ehm, sent me a few pictures of a gorgeous shawl and casually mentioned that she had designed in on the fly and was thinking of writing it up as a pattern (which was just published last week, go take a look!)
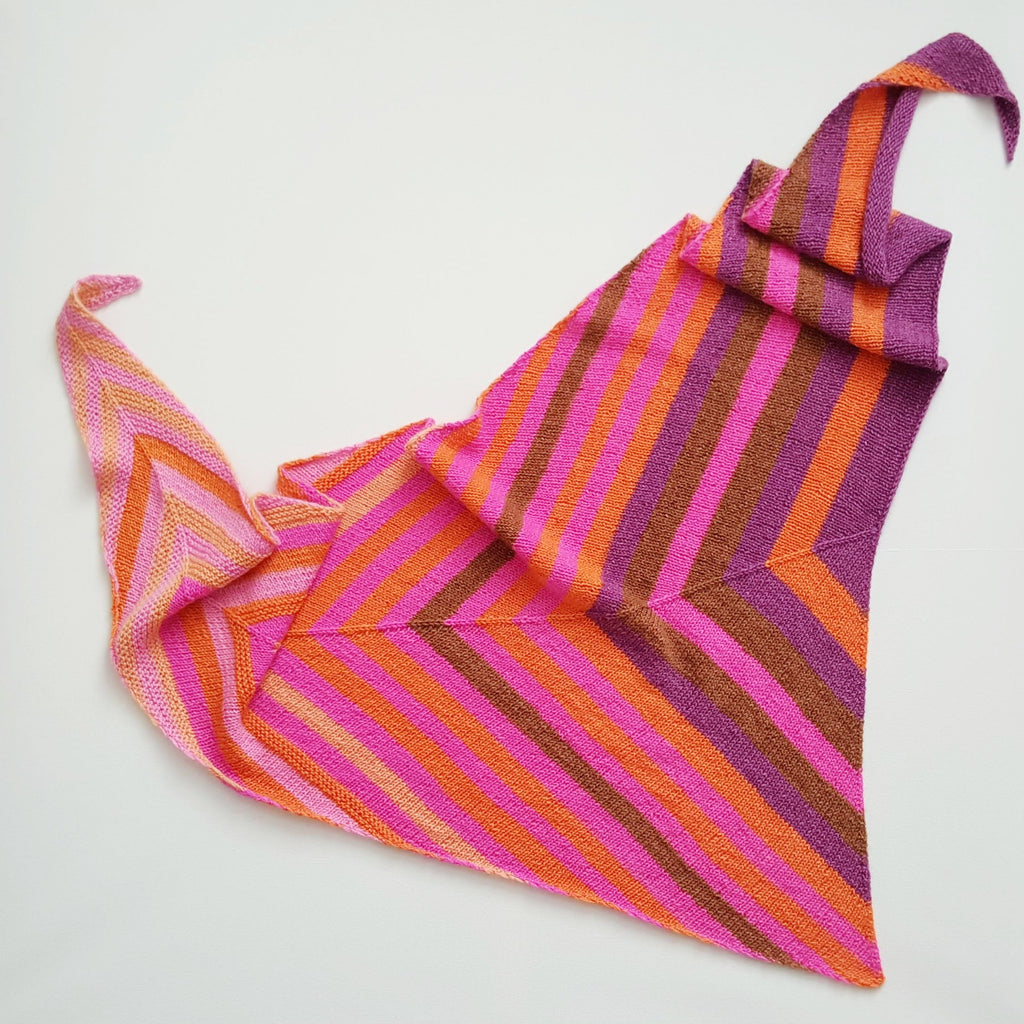
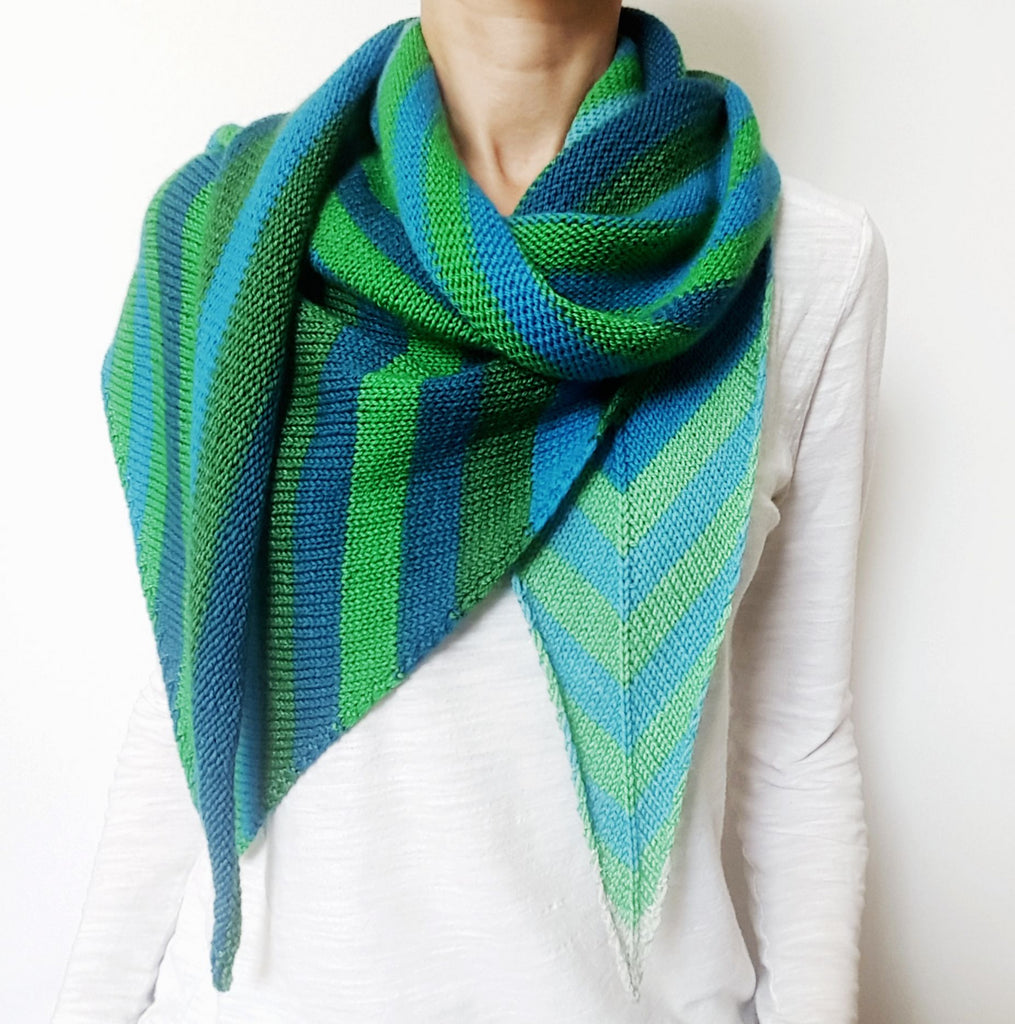
Yeah. It's fantastic. Relatively simple knitting but stunning results. Here it is in the Sweet Baby James and Margaritaville colourways.
The construction begins with an arrowhead-shaped increase section and then begins shifting and decreasing to create an overall triangle.
Tammy mentioned that she switched from one section to the other when she had used half of the yarn. Which is cool and also WHY DOES THAT WORK? It that a fluke that is approximately true when you're using the exact amount of yarn Tammy was using (about 170 g)? Or is that always true no matter what size? And anyway, WHY?
I'm a lot of fun at parties, can you tell?
Right. So. I drew some pictures and I've got an answer.
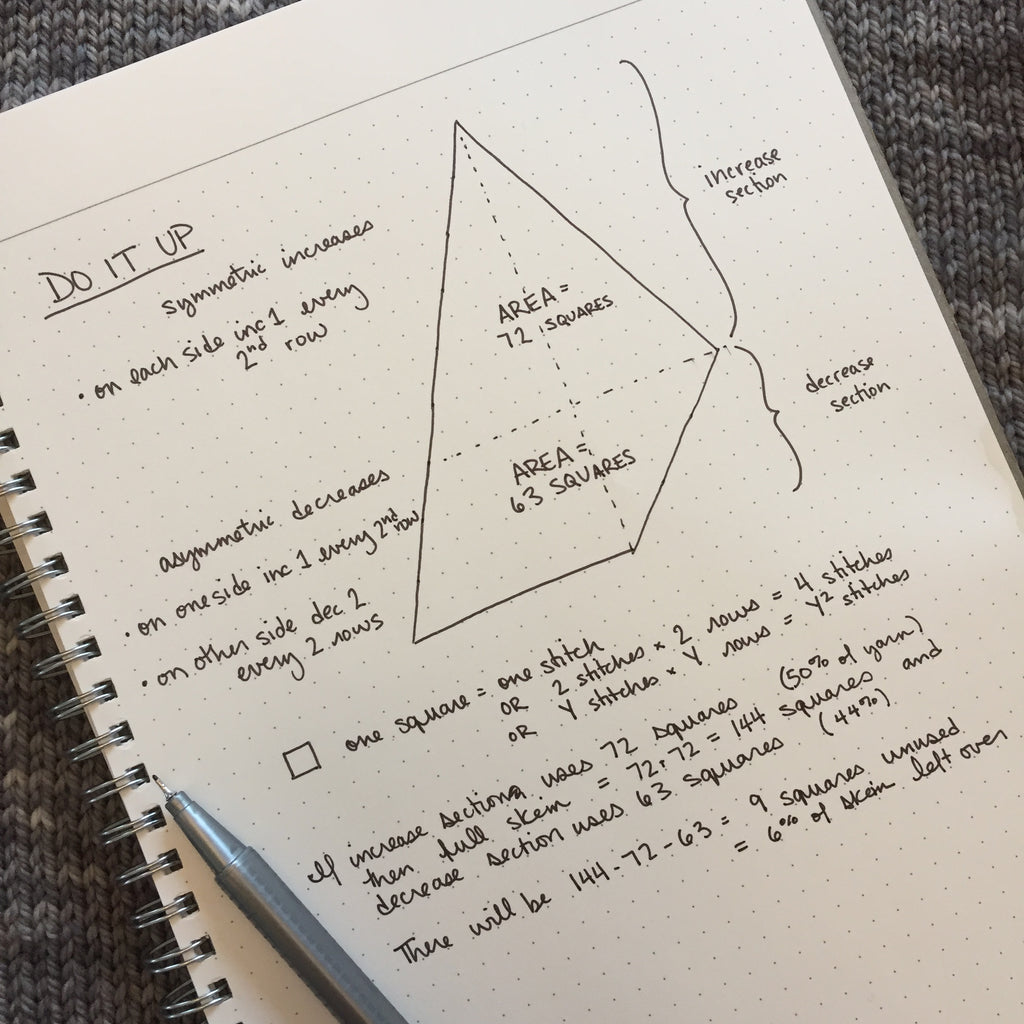
First of all two notes: The shawl doesn't use the entire skein of yarn. In this colourway the final two stripes aren't used (so good news, there's no worry of running out of yarn during the bind off).
Second, note that the picture I drew doesn't look like it's the same shape as the shawl - the first section is a triangle rather than an arrowhead, but the geometry is the same. Each row in my sketch is a row in the shawl, even though the actual knitted fabric will be distorted by the placement of the increases and decreases and look much cooler.
The cast on is at the top of the shawl I've sketched, and increases symmetrically for a while before decreasing asymmetrically. The bind off is the final row of stitches at the bottom. I treated each box in the grid as being X stitches wide and X rows tall, so I can easily draw lines at the appropriate angles to represent, for example, increasing one stitch every second row. It also means this works regardless of how big or small I do my sketch.
Once I'd drawn the two halves of the shawl, all that's left to do is calculate the areas. If that makes your palms sweat, don't worry. You just have to find the cosine of the length of the hypotenuse divided by the shortest line segment and...I kid, I kid. Just count the squares.
72 squares in the first section and 63 squares in the second section means that my sketch matches reality and the first section uses just slightly more yarn than the second. By following the pattern and starting the decrease section when you've used half your yarn, you'll end up with about 6% of a skein remaining. Tadaah!
UPDATE: My excitement about this whole thing was to be able to take advantage of the self-striping yarn and use as much of the skein as possible. You could, of course, also make a smaller shawl by starting the section section at any time before you've used half the yarn. Or if you want to use much more than half the yarn for the first section you'll need a second skein.
Oh, and since someone is bound to ask, my notebook is a Kyokuto Expedient notebook with 5 mm dot grid and it is perfection.